Jablotron 100 Home Assistant Integration
- 06.11.2020

Jablotron 100 Integration für Home Assistant
Home Assistant
Home Assistant (HA) ist eine Open Source-Plattform für die Hausautomation in derselben Kategorie wie Domoticz und openHAB. Home Assistant ist die Hausautomationsplattform der Wahl für unser Zuhause. Innerhalb von Home Assistant habe ich Integrationen mit Philips Hue, IKEA Tradfri und der Xiaomi-Plattform mit einem ConBee II-ZigBee-Stick. Weitere Integrationen sind die Hydrawise-Plattform für die Bewässerung, Gardena für den Robotermäher, Roomba für das Robotervakuum und vieles mehr. Ich wollte mein Alarmsystem in dasselbe Heimautomationsnetzwerk integrieren, aber dies war mit meinem älteren Alarm, einem Jablotron-Profi, nicht möglich. Deshalb habe ich auf das Jablotron 100-System aktualisiert. Eine Installation von Credex Alarm Systems.
Obwohl das Jablotron 100 Alarmsystem die Möglichkeit hat, selbst als Hausautomation zu fungieren, wollte ich mithilfe des Jablotron Smart Hub nicht von den Integrationen abhängig sein, die Jablotron auf seinem SmartHub ermöglicht. Die Home Assistant-Plattform verfügt über eine große Anzahl integrations und eine große Community mit zusätzlichen Integrationen für so viel mehr verbundene Geräte. Die meisten Community-Integrationen werden über den Home Assistant Community Store (HACS) bereitgestellt.
Voraussetzungen
Install Home Assistant
In order to integrate the Jablotron 100 system with Home Assistant you will need to have a working Home Assistant installation. Home Assistant provides images for several hardware platforms. The Raspberry Pi is the main platform of choice, but also virtual appliances are supported with images VMDK, VHDX, VDI. QCOW2 and OVA formats. Finally, there are docker images for QNAP and Synology as well as a native package for Synology.
I have chosen to run Home Assistant on a Raspberry Pi 4 Model B with 4Gb of memory. This is more than enough to run a stable and quick Home Assistant platform.
Installation instructions for Home Assistant can be found here: https://www.home-assistant.io/getting-started/
Install HACS
The Jablotron 100 integration used to be a custom component for Home Assistant that needed to be installed manually. Recently (2020) the integration was incorporated as a HACS integration which makes installation easy. In order to be able to install the integration you will need to install HACS. The installation instructions can be found here: https://hacs.xyz/docs/setup/
Setup Areas in Home Assistant (optional)
When installing the Jablotron integration you will be able to assign all devices to an area. This is not mandatory, but it helps categorizing your entities in Home Assistant later on. In order to create areas, perform the following tasks:
- HA > Configuration>Areas
- Click the “+” in the bottom right corner
- Name your area and hit “Create”
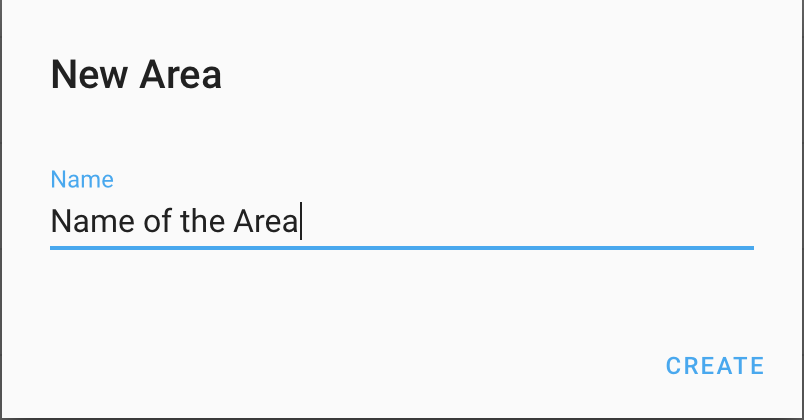
- Repeat for all your areas
Install Terminal & SSH add-on
You will need to ssh into the Home Assistant server later on. To be able to ssh into the server install the “Terminal & SSH add-on:
- HA>Supervisor>Add-on Store
- Look for the “Terminal & SSH” add-on and click it.
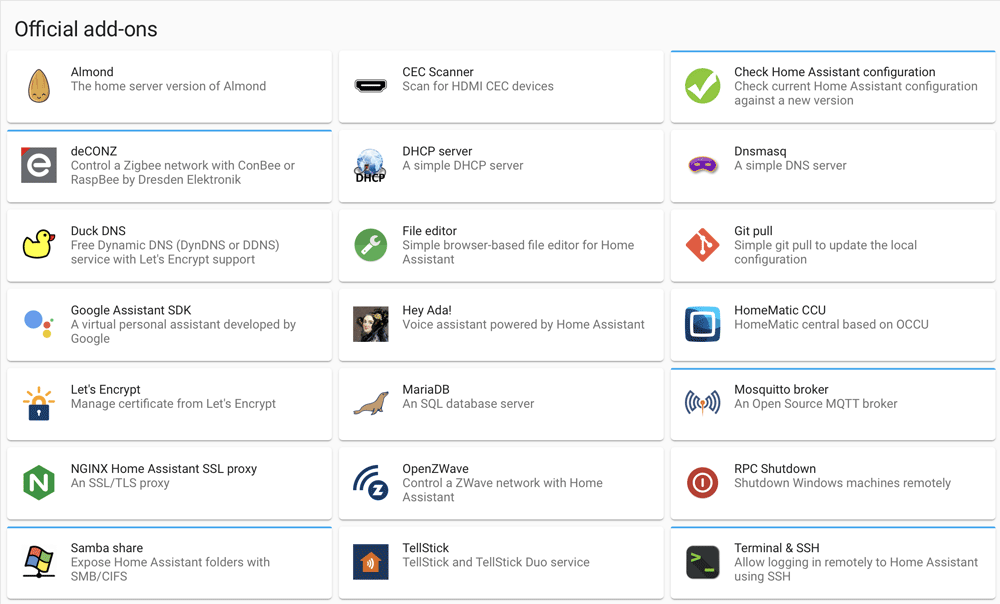
- Hit the “install” button
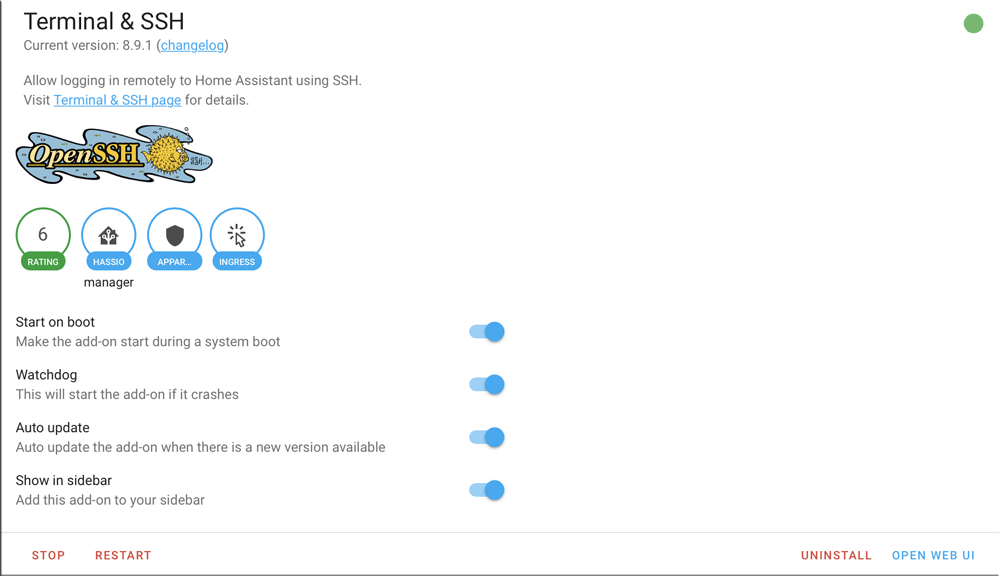
- Go to > Configure
- You can choose to configure ssh with an ssh-key or a password. There are several Youtube videos with instructions to set up ssh-keys.
- Go to > Info and press “START”
Connect Jablotron Control Panel to Raspberry Pi
Now you are ready to physically connect your Jablotron 100 system to Home Assistant. In order to do so, you will need an USB A to USB B cable. Many people have such a cable lying around from when we connected printers physically to our computers. Connect the USB A side to the Raspberry Pi and the USB B side to the Control Panel of the Jablotron 100 system.
Now restart Home Assistant, in order for Home Assistant to initialize the USB port.
When installing the integration, we will need to know which usb port the Jablotron Control Panel is connected to. In order to find this out:
- Open “Terminal” which was installed by the “Terminal & SSH” add-on
- Type “dmesg | grep usb” and hit enter
- Type “dmesg | grep hid” and hit enter
- You should see a message like this return, stating the usb port. In this case “hidraw0”

- Make a note of the name of the usb port.
Install Jablotron integration
Now we are ready to install the Jablotron integration:
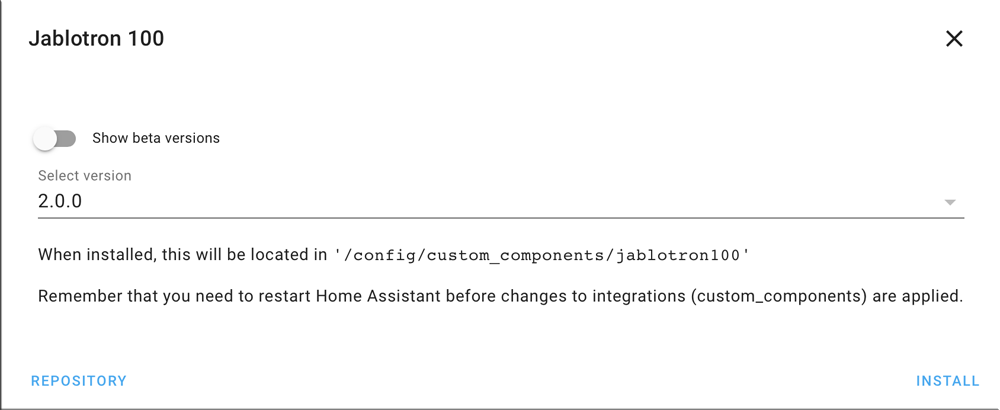
- HACS>Integrations
- Press the “+” in the bottom right corner
- Search for “Jablotron” and click it

- Press “Install this repository in HACS” in the bottom right corner

- Select the latest version and press “Install”
- We will need to restart HA Configuration>Server Controls>Restart
The Jablotron integration is now installed in HACS, which means we can configure the integration in HA
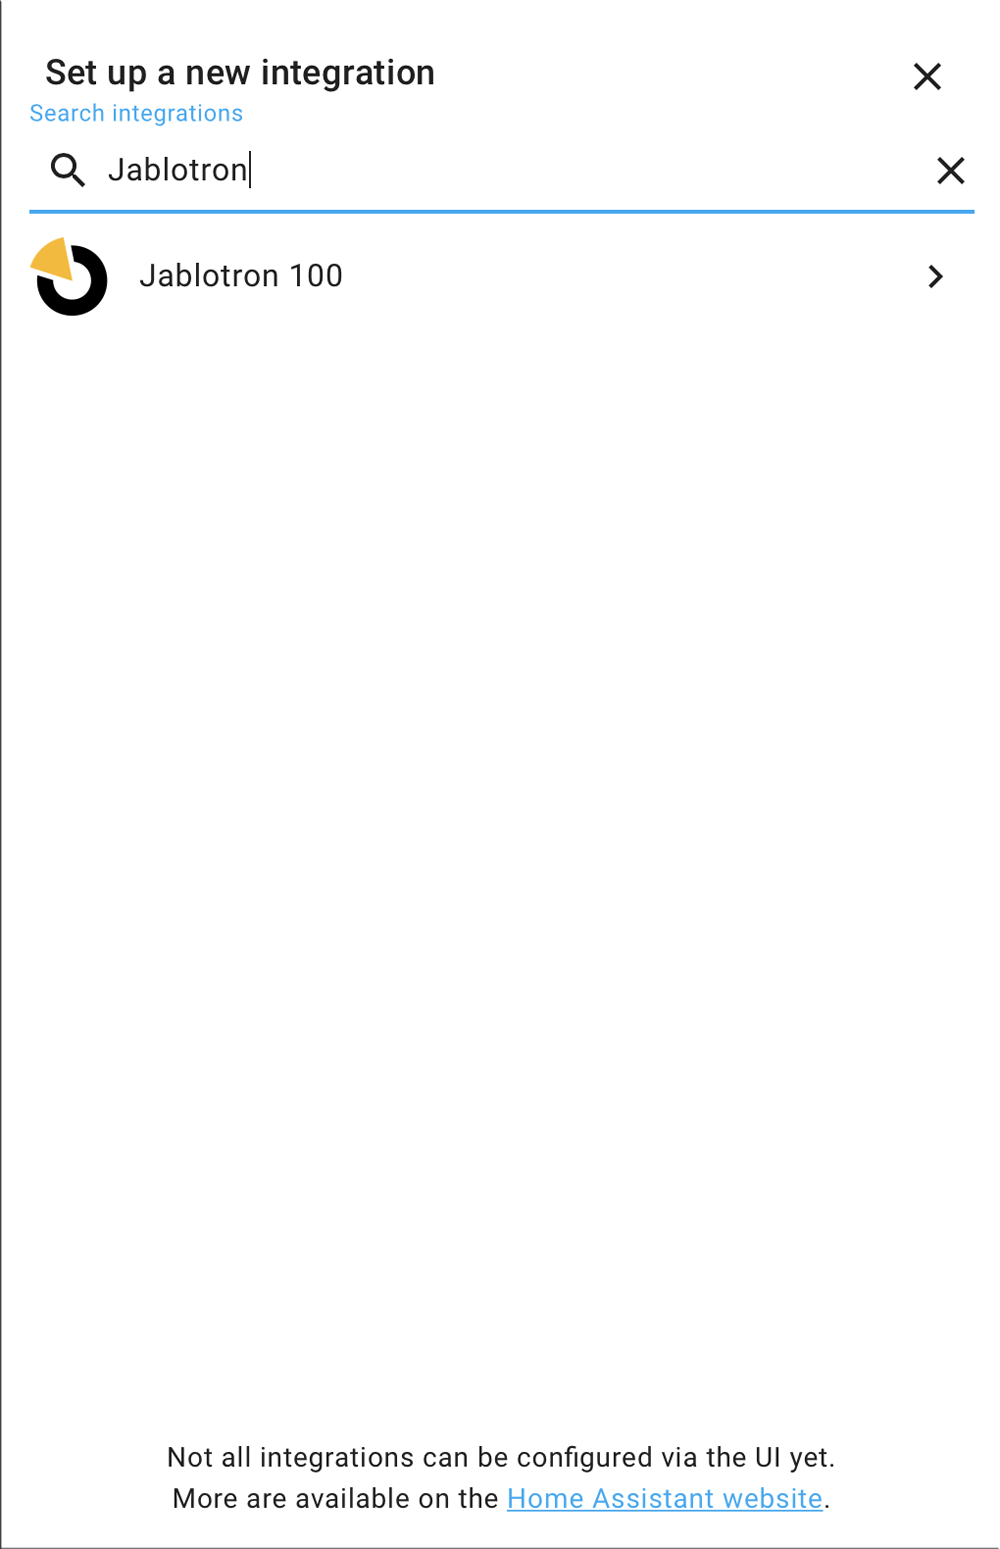
- Configuration>Integrations
- Pres the “+” in the bottom right corner
- Search for “Jablotron” and click it
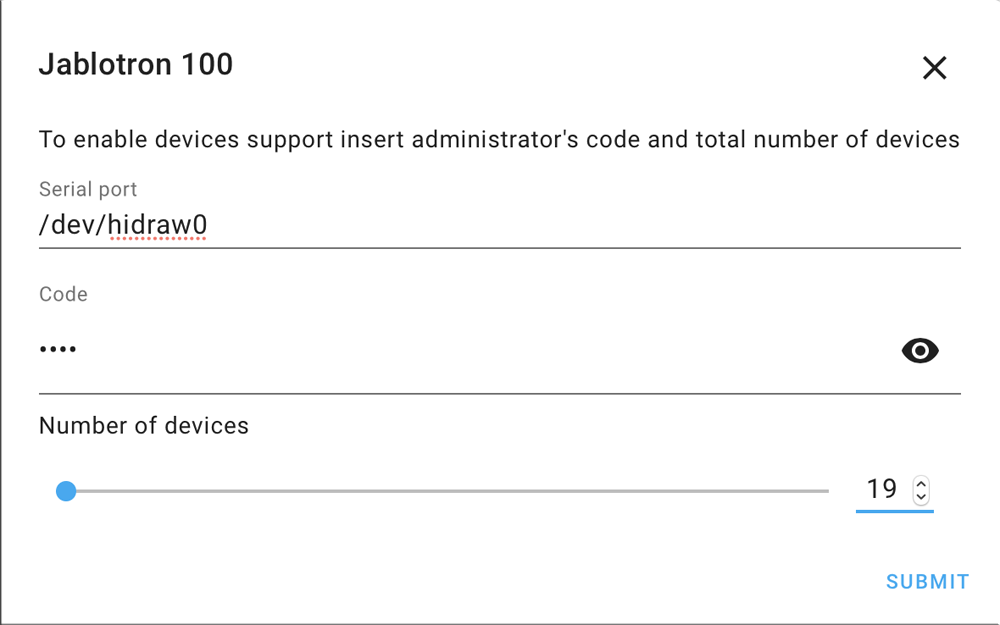
- At the “serial port” fill in “/dev/your_usb_port” The USB port is the one you found in the previous paragraph.
- At “code”, fill in your master pin code for the Jablotron system, defined in F-Link
- Now select the number of devices to integrate. You can find this in F-Link. Apart from the Control Panel, there are 19 devices in my configuration.
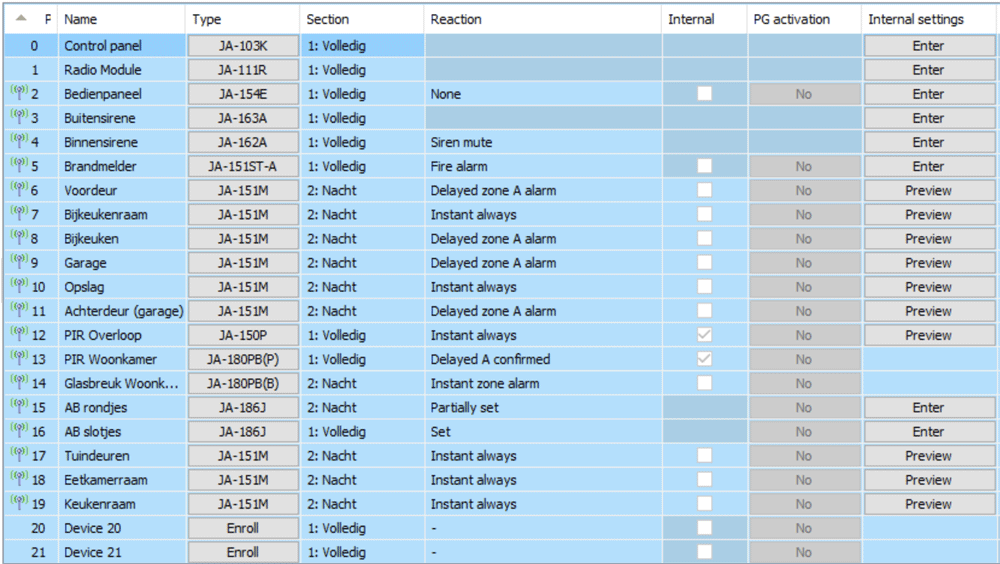
- For every device you have to define what type of device it is. Please note that some devices are not integrated in the integration yet. In those cases, select “Other”. The device numbers have to match the order in F-Link. Press “Submit”
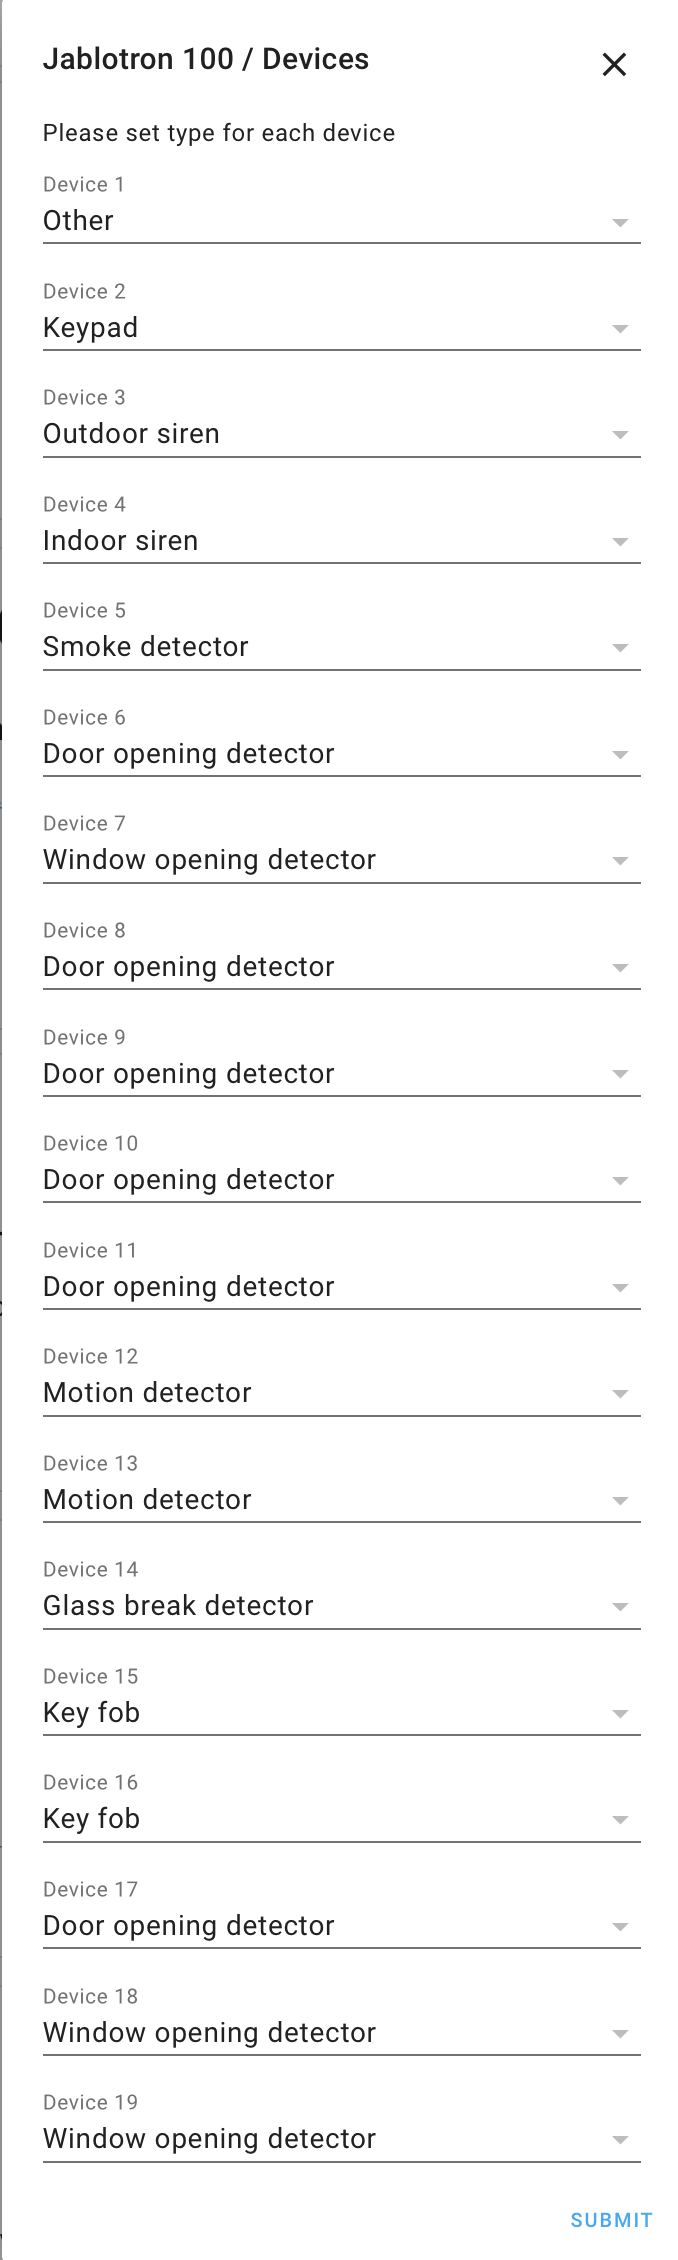
- You can assign every device to an area. This is optional and you need to have created the areas in the previous paragraphs. When assigned press “Finish”
Please note that the keypad will show as “Section x” There will be as much sections as you have defined in F-Link.
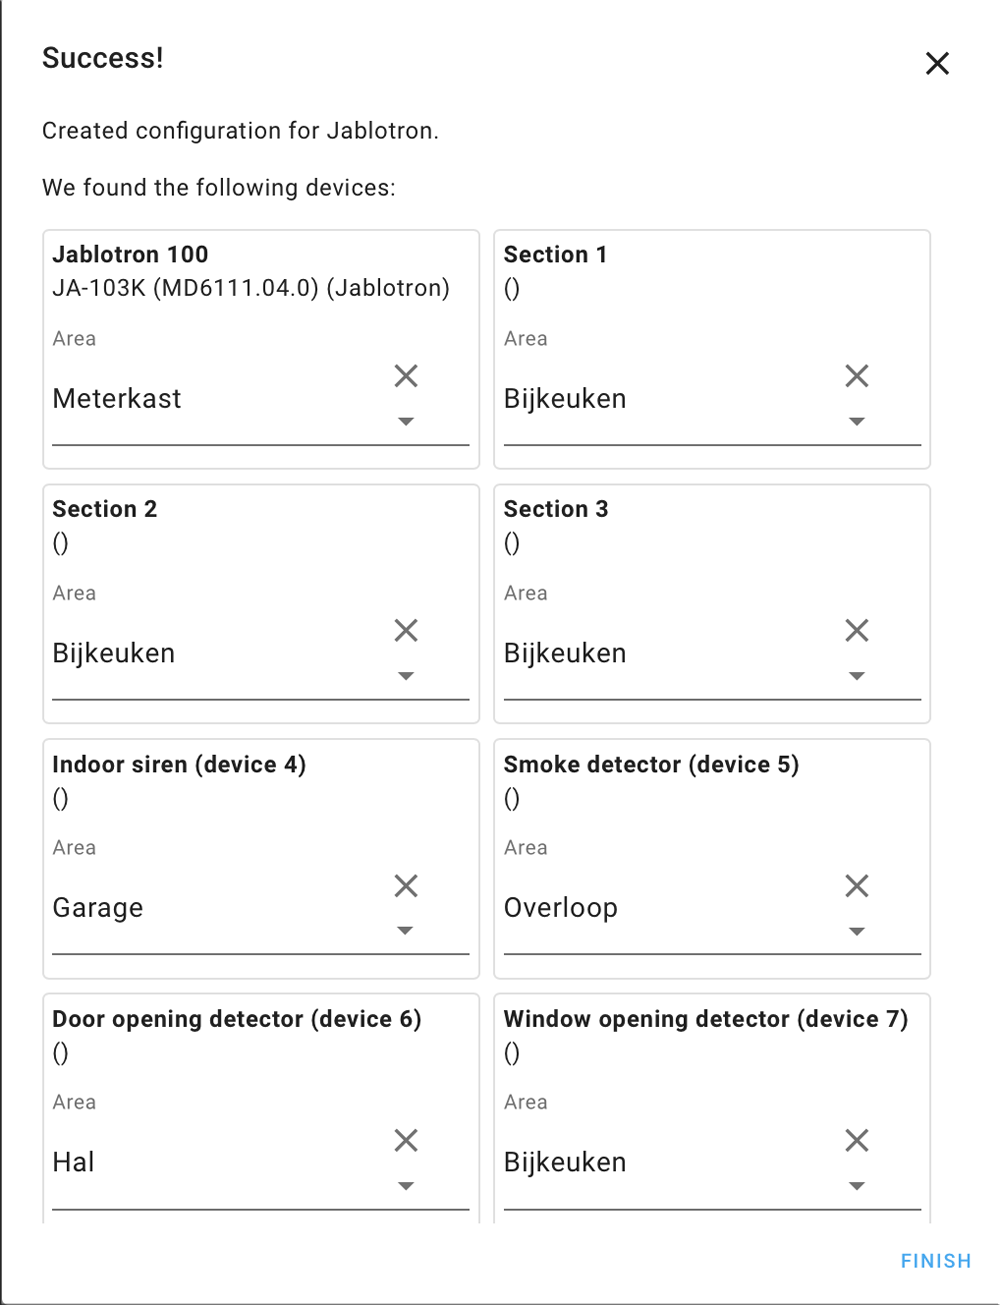
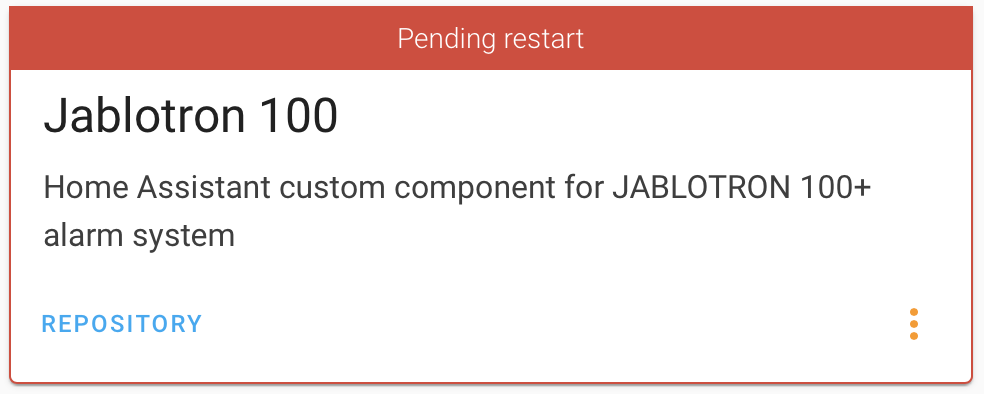
- You have now successfully installed the Jablotron integration.
Add Frontend Card to Home Assistant
All sensors should now be operating. In order to control the system, you can add cards to the frontend. This can either be done by the visual editor or through adding code to the ui-lovelace.yaml. As my installation utilizes the code variant, I am unable to show the visual editor. Here are some examples of my code elements.
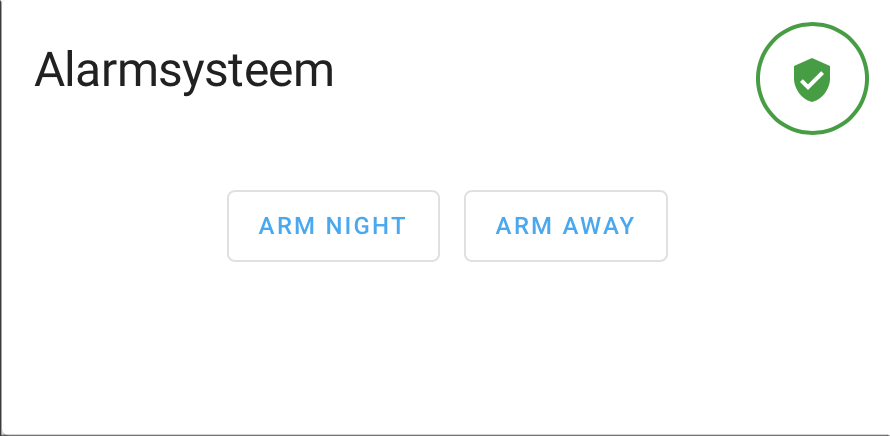
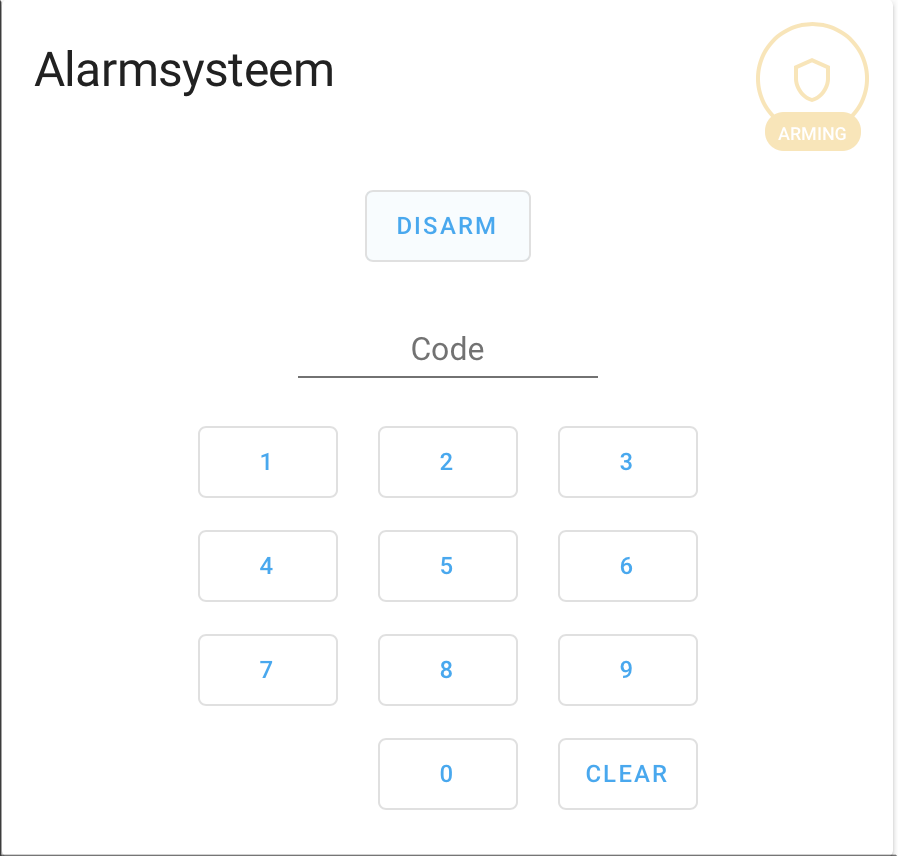
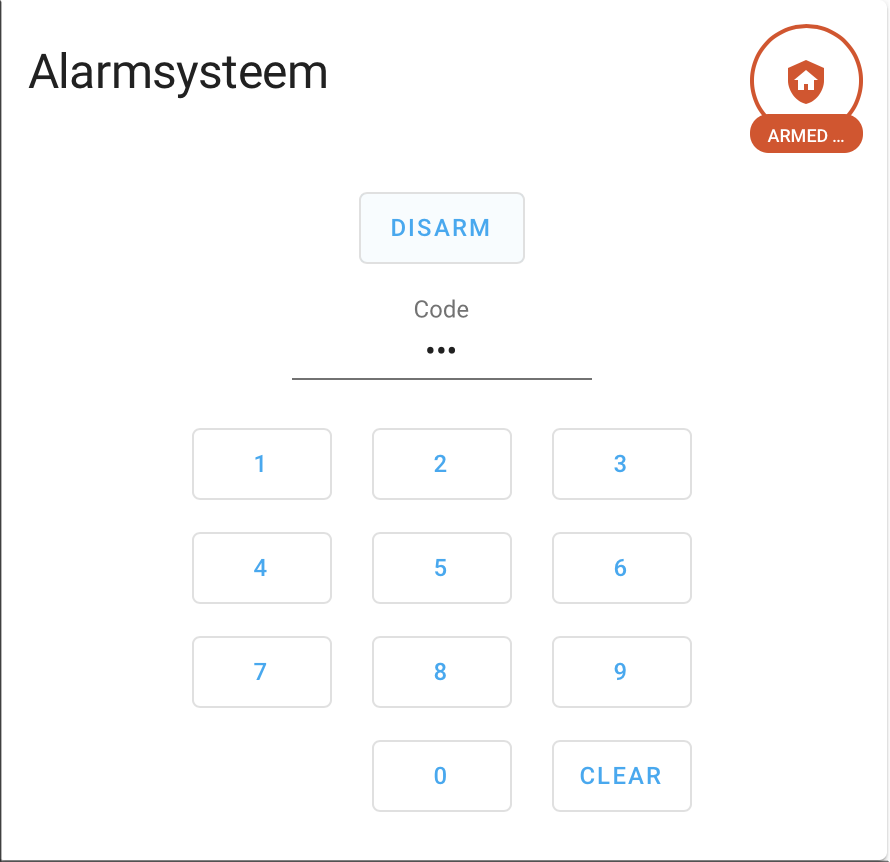
Control Panel:
- type: alarm-panel
states:
- arm_night
- arm_away
entity: alarm_control_panel.section_1
name: Alarmsysteem
Door Sensors:
- type: glance
entities:
- entity: binary_sensor.door_opening_detector_device_6
name: Voordeur
- entity: binary_sensor.door_opening_detector_device_8
name: Bijkeukendeur
- entity: binary_sensor.door_opening_detector_device_9
name: Garagedeur
- entity: binary_sensor.door_opening_detector_device_10
name: Opslagdeur
- entity: binary_sensor.door_opening_detector_device_11
name: Achterdeur
- entity: binary_sensor.door_opening_detector_device_17
name: Tuindeuren
title: Deursensoren
show_name: true
show_icon: true
show_state: false
columns: 2
state_color: true
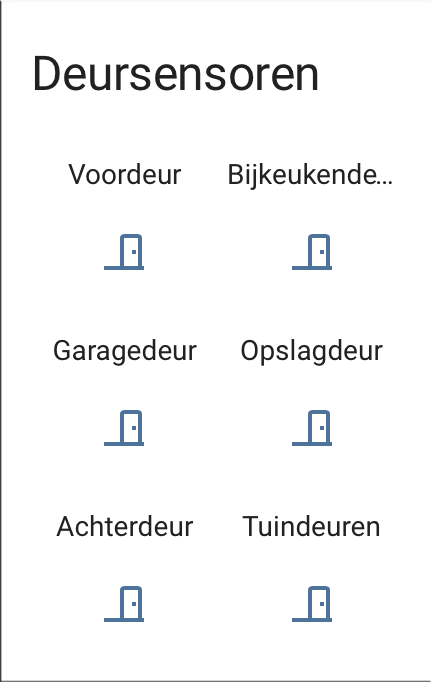
Activated sensors will show yellow when triggered.
Automations
Now that you have all sensors in Home Assistant, you can start using the entities in automations. For instance, in my case, whenever I activate the Jablotron alarm, I also enable my Blink camera system automatically 15 minutes later. The automation for this looks like this:
id: '1603462148150'
alias: Alarm, arm Blink when Jablotron armed
description: ''
trigger:
- platform: state
entity_id: alarm_control_panel.section_1
from: arming
to: armed_night
- platform: state
from: arming
to: armed_away
entity_id: alarm_control_panel.section_1
- platform: state
from: disarmed
to: armed_night
entity_id: alarm_control_panel.section_1
condition: []
action:
- delay: 00:15:00
- service: alarm_control_panel.alarm_arm_away
data: {}
entity_id: alarm_control_panel.blink_blink_vieleers
mode: single
The possibilities are endless when you have all your smart home devices into one platform like Home Assistant.
Some examples:
- Let your lights flash when the Jablotron siren is activated.
- Send notifications to your phone when sensors are triggered.
- Have Home Assistant remind you on your google mini that you have left one of the doors open.
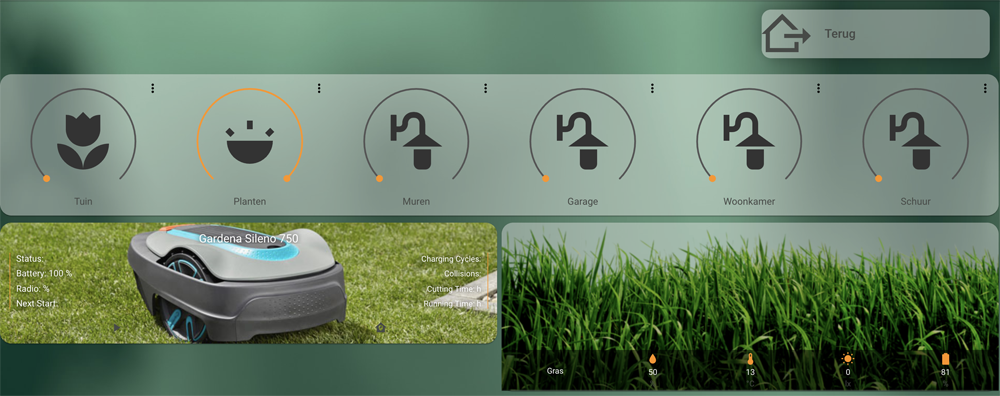
Final integration
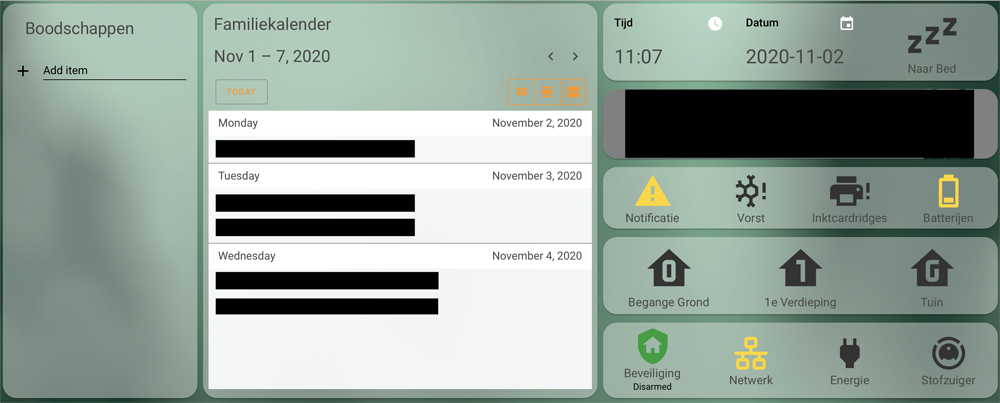
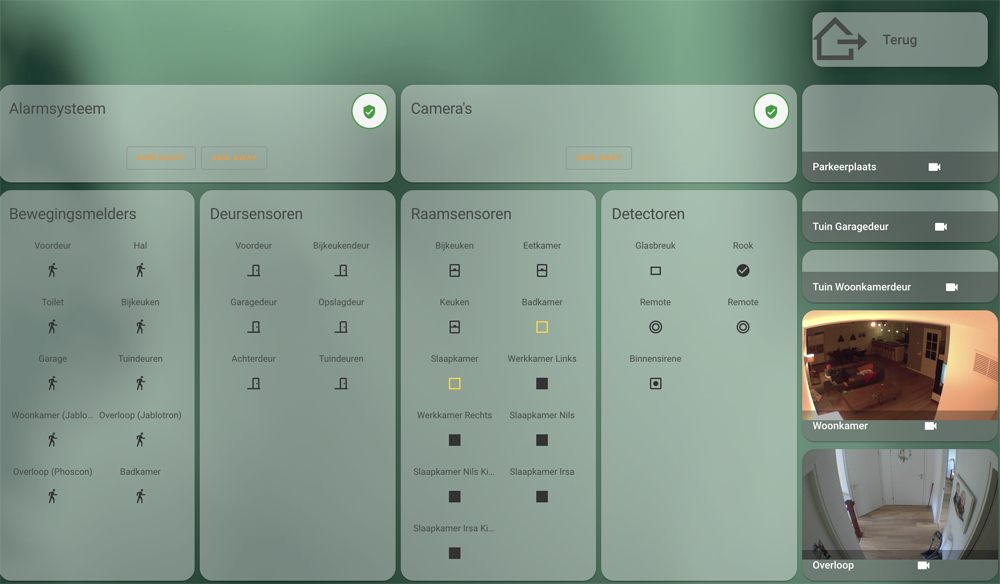
Just to get you warmed up, here are some screenshots of my Home Assistant integration with a customized theme and various integrations:
Succes!
Author: M. Vieleers
.

Verwandte Beiträge